Ohhh. Yes.
I was rummaging through their sweater collection and picked up this nifty green wool turtleneck sweater.
With Threadbangers's 100th Episode fresh in my mind, I set to work!

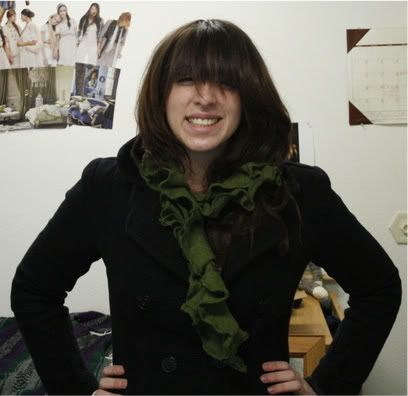
Tadaa!!
The Threadbanger tutorial is for a wrap-style scarf, but I switched it up a bit and added some pleats.
Click for my tutorial!
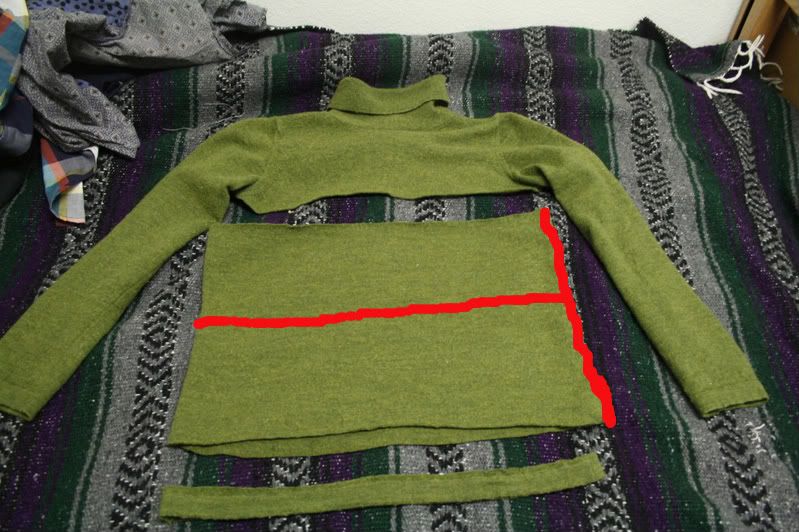 Start out with any stretchy sweater.
Cut a straight line from armpit to armpit, and separate the body from the arms and neck.
Cut off the bottom hem.
Now you have this circular rectangle thing.
Cut off the seam at one side,
giving you one big rectangle.
Finally, cut this big rectangle in half lengthwise (hot-dog style),
So you end up with two thinner rectangles.
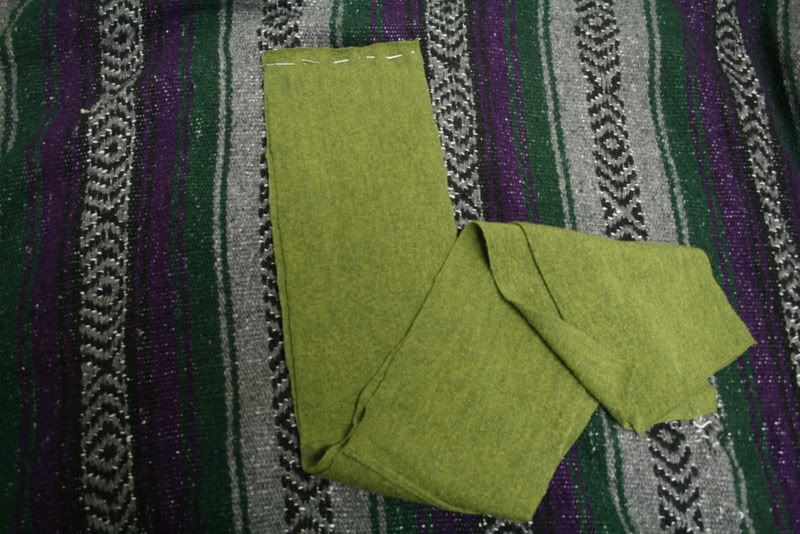 Next, pin together the two thing rectangles with their right sides facing.
Sew the pieces together, first with a straight stitch, then with a zigzag stitch. (Why? I dunno, that's what threadbanger told me.)
Now you have one longgg rectangle!
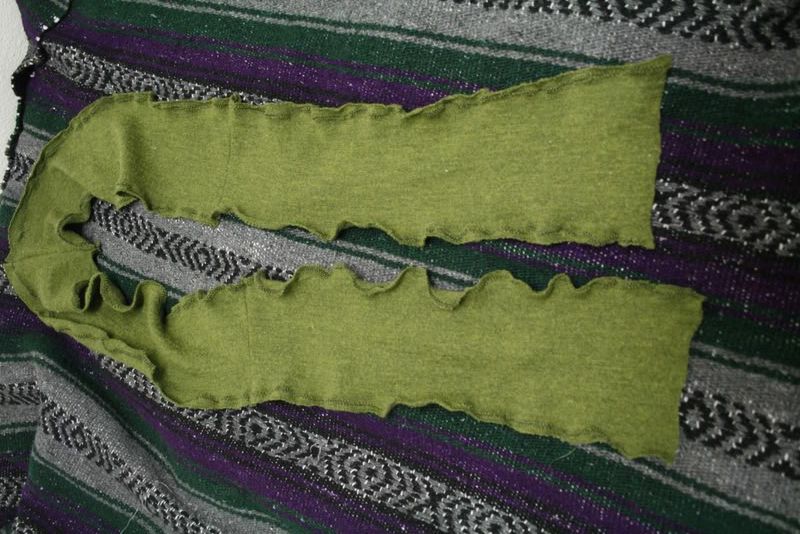
Using a zigzag stitch sew around the entire perimeter of the scarf, stretching it as you go.
This will give you a pretty cool 'lettuce-edge'.
On the Threadbanger video I linked to up there ^,
they demonstrate sewing the lettuce edge, if you'd like yourself some more visual stimulus.
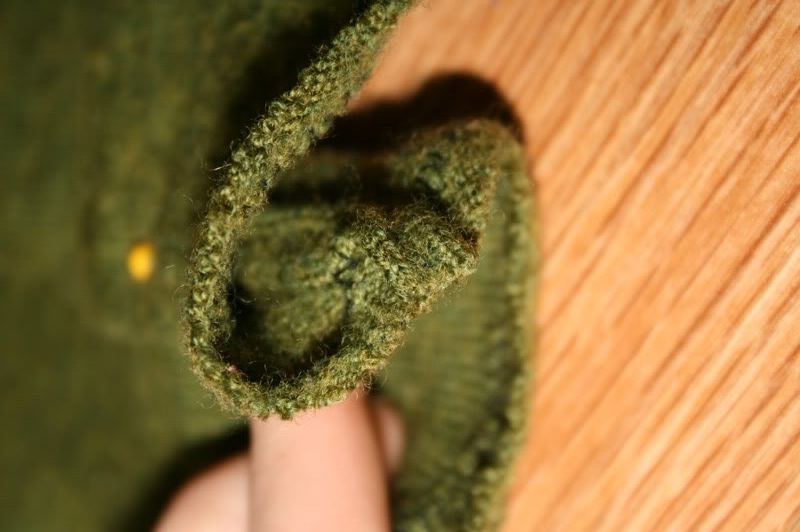
In this picture, I haven't sewn the lettuce edge at the ends of the scarf yet, don't forget to do that!
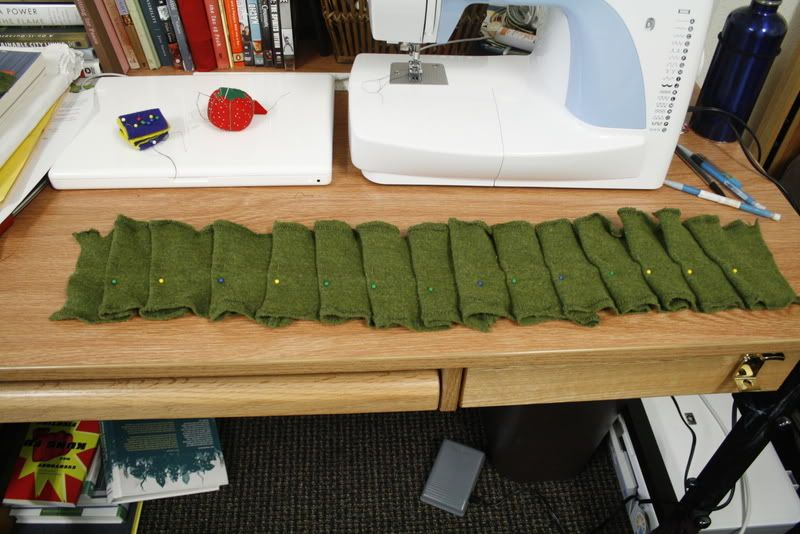 Next, lay the scarf out and fold it over itself, over and over until you get little pleat-ruffle things.
Pin them in place.
You can do this however you like, I think mine are about 1-1.5 inches wide.
If you have patience, you can arrange the pleats to hide the seams of the sweater.
When you fold the pleats, center the seam on the inside of the "S" the fabric makes.
If you do this right, you shouldn't be able to notice the seams after you sew it!
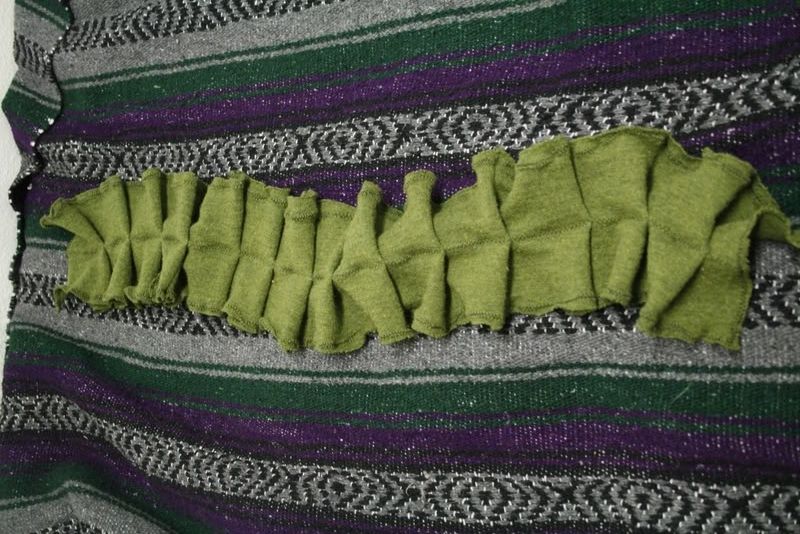
Finally, sew a zigzag stitch straight down the middle.
Take out the pins, fluff out your scarf, and promenade around town!

Hi I saw your post on craftster and came on over. Great tute, have bookmarked it for later in the year. I love the colour too!
ReplyDeleteThanks for sharing
That's really great, thanks so much for sharing!!! :)
ReplyDeleteSo cute, what a great use for an old sweater. Thanks for sharing.
ReplyDeleteI absolutely love this idea. I have an old sweater already I want to turn into a scarf, and this seems perfect. One question though, once you make the pleats and sew the line down the middle, the scarf will then be that length, right? (you can stretch it out a little after you put the pleats in, in other words)? I'm totally new to sewing so this really helps me out. Thanks!
ReplyDeleteWhatever length the scarf is when you pin the pleats down will be its final length.
ReplyDeleteBut because you only sew a line through the middle, the ends of the pleats kind of flare out a bit (you can kinda see this in the pictures)
Maybe if you sewed elastic in instead it could be stretchy!
So very cute! I followed the link from Craftster. Thanks for sharing your tutorial. I will definitely make this. I can't believe this was one of your first sewing projects. You did a great job!
ReplyDeleteI am just starting out my blog too. I'll link to you!
Kathleen
sewing-green.blogspot.com
This is great! I have been sewing for over50 years, but this s one of the cutest beginner projects I have ever seen. Well have to sew one for my Granddaughter. Thanks for sharing. Toni
ReplyDeleteThis was such a fun and easy project!!! It took less than an hour and looks amazing! Look out goodwill, your sweaters are mine!!!
ReplyDeleteI'd love to see your version!
ReplyDeleteI love this! Sounds like a trip to the second hand store is in order. Thanks for the easy how to.
ReplyDelete