Showing posts with label Thrifty. Show all posts

Sunday, August 29, 2010

Oh, What providence!


So I was walkin' to the farmer's market with a buddy, mindin' my own business..

When out of nowhere I stop dead in my tracks. *SCREECH*
Sitting on the sidewalk is a gorgeous antique bedframe. "Is it free? Is it free?" I pester my buddy, as if he had otherworldy knowledge  that I did not. Sure enough the makeshift sign taped to the palm tree said FREE!

What providence! I recently got a new roommate and downsized from a queen mattress (that was acres to big for me) to a nice and comfy twin. Yet I had no bed frame. I had been sleeping with my mattress on the floor because I absolutely refuse to spend even forty dollars on a cheap-o ikea bed frame. I knew someone, somewhere had to have one they didn't need, but I assumed it would be someone in my family or friends, and that it would just be a very simple standard one. Who knew that right around the corner, adorable bed frame destiny awaited me!


It is a gold color and super sturdy, regardless of it being pretty old-looking.

Sunday, July 25, 2010

Tutorial! Your Friendly Neighborhood Skully Necklace...

July is birthday month in my family.

My Grandma, Dad, Cousin, both my sisters and I are allllll born this month.
And just to spice things up, my parents unconsciously decided to have my sisters and I all within a day of each other.

So what better way to get out of a mid-summer craft funk than with lots of impending birthday parties? (No better way obviously.)

My littlest sister is super-cool and original, (in those early teen years, that's a feat!) has gauged ears (ALREADY!) and wants to be a tattoo artist (a profession my mother actually endorses).

All in all, she's a pretty hep cat.

So I decided to make something that would fit her personality.


A friendly family of felt skulls she can wear around her neck!!

This is a super easy project and the technique could be used to make a felt necklace out of any design IN THE WORLD you can draw, photocopy or find clip art of! ANYTHING!!!!

(Ok now, don't get too excited)

Wednesday, June 23, 2010

DIY Lazy Susan with Woodburned Fish Design for Father's Day

For Father's Day, I made my daddy a custom "lazy suzan" turntable thingy!

I picked up a really old and faded Ikea-brand lazy susan at the thrift store, drew a fishy design on it (my daddy is quite the fisherman) and set to it with my trusty woodburning tool.

*segue* Have I told you about my trusty woodburning tool? It looks like this and not only does it let me burn designs into wood, but I can solder things and melt plastic and.... MWUAHAHAHAA. I love it and have to sit on my hands to avoid the urge to burn holes in things with it.

Anyway, after carving my fishy design into it:


*Cute dead fishies!*

Thursday, March 18, 2010

SWEET FREEDOM!

I had my last final today...

SPRING BREAK!

woohoo!

Thiiis time around I am going to make the best of it.
LOTTSA crafting.
aaand..
I'm going to LA for the first time ever!
Can you believe that I live in San Diego and have never been to L.A.?
I really, really don't get out much.
I'm going on Monday with one of my oldest and most fabulous friend.
Our destination is the garment district and all the goodies it will behold.
I am going to try to load up on some fabric so I can get my sewin' on!

BY THE WAY...

I had entered a contest on Instructables.com a while back with my ruffle scarf tutorial (which is the first post I ever did on this blog). Grand prize is this great serger/embroidering/everything machine and 1st prize is a dress form.

Well... I am a finalist! Go read my instructable here.


The contest is in the judging stage now, and the results will be in Monday.
Now, take a moment to imagine me standing in the middle of the L.A. garment district, and finding out that I won a serger or dress form.
What fate!
What providence!
What a great excuse to spend monies on fabric!

Regardless, I am happy just to be a finalist, and either way I am really starting to up my sewing anty.  If I don't have the good luck of winning a serger, I am going to start trying to save up money to get one myself.
I just have this huge itch to sew knit fabrics.
My own hoodies and rib-knit tank tops (my favvvvorite) and and and....
**droooool**

Anyway, I feel like I am going to be on a posting roll for at least the next week. I'm going to hammer out pictures of all those projects I've done but haven't mentioned (you mean you didn't know?) and all those tutorials I have backed up, as well as some great pictures from L.A. on Monday coming up!
Yay!

Sunday, November 22, 2009

What I was doing all October.

...and as she took each new step through the darkness, she could sense the entrance to the cave, the blinding light pouring fourth, and beyond it the world to behold!

Anyways, that's what it feels when you rediscover the wonders of having wireless internet!

For the past few months, I've been hookin' up ol' Betsy the old fashioned way... with a gawddarn ethernet cord.

*segue* ether.. net? What does that even mean? Why do they call it that. "Ether" is such a... ethereal  word. ... ha. haha... *unsegue*


Really, what use is a laptop when you are confined to a desk? Laptops were meant to be wild and free. Go on, Betsy. Thata girl. Hum your little internal fan off into the sunset!

... Yeah. Life is better now. I haven't blogged for a while though. I keep doing these projects and then I think, "Oh, OH! I want to put this on my blog!" And then I decide I am too busy and I should read some homework instead, but I end up not reading the homework at all and....

Well today I thought to myself,

"Hey you, I know you have homework. But really? Aren't you just going to do a good 2/3 of the night procrastinating?"


"Why yes, self. I won't lie, that sounds pretty precise."

"Why don't you just acknowledge and come to terms with your procrastination and do something productive with it?"

"By Jove! That sounds like a great idea!"

So here I sit. (In my big couch chair thanks to the wonders of wireless internet) 


This is officially catch-up blog #1. 

So lets see.

#1)

A big (ongoing) project I did recently was..


Dye my hair!

I bleached it, walked around as a blonde for a bit, then added some color!

I've been super inspired by this girl's flickr page I randomly came across:

http://www.flickr.com/photos/racheljoyagatha/sets/72157617705834538/show/


and now all I want is to be a different color everyday!

 #2)

 Most of October I was working on tons of costumes for my work. We were putting on a carnival event and I decided that it just wouldn't suffice unless everyone was in costume, so here is what I came up with:


The ringmaster!

Ruffled shirt and bowtie/cummerbund: Thrifted

The jacket was thrifted and then altered to be a tailcoat, and the red collar, buttons and cuffs were added. Making regular jackets into tailcoats is a skill I think everyone should use! So I'll post a tute when I get the chance.

Here's another one with his hat:

Saturday, March 21, 2009

Adorable Apple Caramel CupPIEcakes.

Friday was a very happy day.
I finished my last final, got into spring break mode, annnnnnnddd...
got tons and tons of veggies for free from our campus food coop!!
They aren't open during spring break, and instead of throwing out, or letting the veggies meet their impending rancid doom,
they gave them to me!!

So fast forward to this afternoon.

I'm looking at about two pounds of organic apples that are going mushy and I realize there is no way I am going to eat these all before they get all brown and spotty.

Solution?

PIE!!!!


I was so excited. It was pie time! But...
oops.
I guess I DON'T have a pie pan?
Hmm.

Never fear! A little thing like not having an actual pie pan wasn't going to stop me from achieving pie-y greatness.

So I scraped together the two things I DID have, a bread pan and a cupcake pan.

After Frankensteining together a few different pie recipes, the result was these:
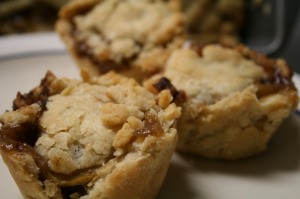
img_7106


ZOMG SOOO CUUTE!!!! !(>.<)!

Here are the cuppiecakes with their mama:
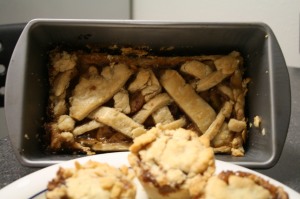
img_7107

The crust is super flakey and delicious and the caramel is the perfect touch.

Make them! I dare you. Every day is special enough for a Apple CupPieCake.

Note: Once again, this recipe is super Frankensteined and I've never posted a recipe before so, I apologize for it being long and not easy to read. I'll work on that.
Also, I'm not exactly sure how many apples to use because I had a billion of the small organic kind, and because my goal was to use them all, I ended up with CupPieCakes, the Pie-in-a-Breadpan, and almost two cups of apple left over for applesauce. I suggest maybe 3-4 large ones. I suggest if your goal is just to make delicious pie and not to use up a plethora of apples before they go rancid, then get more than you think you'll need. You can always make more!


Adorable Caramel Apple CupPieCakes:


(Use vegan versions of ingredients of course.)

    Pie Crust


-(from http://www.almostvegan.com/archives/2004/06/pie.html)

2 1/4 Cups All-Purpose Flour
1 Teaspoon Salt
3/4 Cup Vegetable Shortening (like Crisco)
4-5 Tablespoons ice water

1.) In large bowl mix flour and salt. With pastry blender or 2 knives used scissor-fashioned, cut in shortening until mixture resembles coarse crumbs.
2.) Sprinkle in ice water, 1 Tablespoon at a time, mixing lightly with fork after each addition, until dough is just moist enough to hold together. (the less water you use, the flakier the crust)
3.) Shape dough into 2 disks with your hands, one slightly larger than the other. Wrap each in plastic wrap and refrigerate 30 minutes.

    Filling


Thinly Sliced Baking Apples. (I used the yellowy-greeny-tinge of red kind)
Cinnamon
Caramel topping: (based on http://vegweb.com/index.php?topic=22283.0)

    1/2 cup vegan margarine (the stick kind)
    3 tablespoons flour
    1/2 cup sugar
    1/2 cup brown sugar
    1/3 cup water

In a saucepan, bring "Caramel" topping ingredients to a boil, then reduce heat and simmer for five minutes.

    Assembling


1. Take out your refrigerated pastry dough. On a floured surface, roll it out as thin as you can. Don't worry too much if it tears.
2. Tear off square pieces of dough approximately 2 inches bigger on each side then the diameter of your cupcake pan holes.
3. Lay the pieces each over the hole and then push gently down so it lines the pan. Cut off any overlap.
4. Take your apple slices and break them into pieces to fit your cupcake pan, fill each hole with apples to the top. Shake some cinnamon on top.
5. Take the caramel sauce, and fill each mini piecake with sauce until it reaches the top.
6. Top the piecakes with pieces of whatever dough you have left over.
7. In an oven preheated to 425 degrees, place your piecakes on the middle shelf and bake for 15 minutes.
And here's where it gets iffy again because I can't remember if I baked them longer then that.
I know it was at least 15 minutes, but it could have been as much as 25.
So check them out at 15 minutes, if the crust is golden and the filling is bubbly and looking like if you leave it in any longer it's going to Pompeii all over the place, it's time to take them out.
8. Let them cool!!
9. To get them out, run a knife in between the pan and the edges of the piecake. If it starts spinning, then it's loose enough. Using two knifes on either side, kind of shimmy the piecake out carefully.
10. Dig in!! No fork required.


I suppose you could make an ACTUAL pie out of this if you have a pan, but that is just not as fun.
:)

Saturday, February 28, 2009

DIY Leggings and Knit for Charity!

I was just think about how much I want customized leggings.
Then I happen upon this tutorial!

img_8969-354x531

Also,

Do a little something for someone in need (as well as your karma!) and try knitting for charity.
This organization, Knit-a-Square puts together 8x8 squares knitted by charitable knitters like you from all over the world into blankets for children living in poverty in South Africa.
It's such an easy way to make a difference in a child's life, and as the ladies at Knit-a-Square say;
"A dollar lasts a day, blankets are for life."

Monday, January 19, 2009

The Two-Dollar Ruffle Scarf!

I have to constantly remind myself how lucky I am to have a thrift store on my college campus.
Ohhh. Yes.

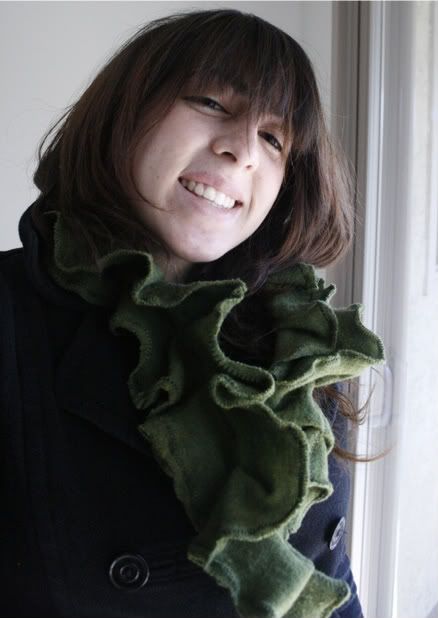
I was rummaging through their sweater collection and picked up this nifty green wool turtleneck sweater.
With Threadbangers's 100th Episode fresh in my mind, I set to work!


Tadaa!!
The Threadbanger tutorial is for a wrap-style scarf, but I switched it up a bit and added some pleats.


Click for my tutorial!